
When we first moved into our home, there was a corner of our backyard leading to a side gate that remained untouched—a neglected area under a large tree where nothing seemed to grow. It wasn’t a priority for S to improve this space, so we left it alone.

Since the area was just a bare ground, I always avoided using that gate to minimize dirt and dust tracked into the house. However, that gate is S’s favorite entry, keeping the inside clean needed a lot of attention.
This area never got much sunlight, so planting anything there was out of the question. I also noticed some utility flags in the area, which made fixing up more complicated. We never really had a serious conversation about working on this area, but it was always on my mind that I wanted to do something about it.
From time to time, I considered a few ideas, like using gravels or pebbles, but those options weren’t right for us. Gravel would be difficult to maintain because the leaves from the big tree would be nearly impossible to clear. Pebbles may get slippery when it rains and could be dangerous. Pavers or concrete slabs were ruled out since S wanted to keep the area well-drained. Flagstones with rocks or gravels around the edges could be a good choice but again we had never seriously pursued it and it remained on my wishlist.
Then things changed. With S home more and us preparing to move and possibly rent out the place, we finally had a good reason to improve the area. But we were on a tight budget, and time was short.
At first, I thought about creating a pathway using flagstones, but I couldn’t quite figure out how to make it blend with the rest of the bare area. I tend to see things as a whole rather than in pieces, so I wanted something that would fit well. While brainstorming, I remembered how much I wanted a bench or a seating area around the tree. I started looking for photos of similar setups online, which sparked an idea: building a shallow deck.
Inspired, I shared the idea with him, and he got to work designing a deck that would be affordable, easy to build, and leave room for future improvements if we wanted to expand it later. He’s built decks before, so it didn’t take him long, especially since it was a small area.
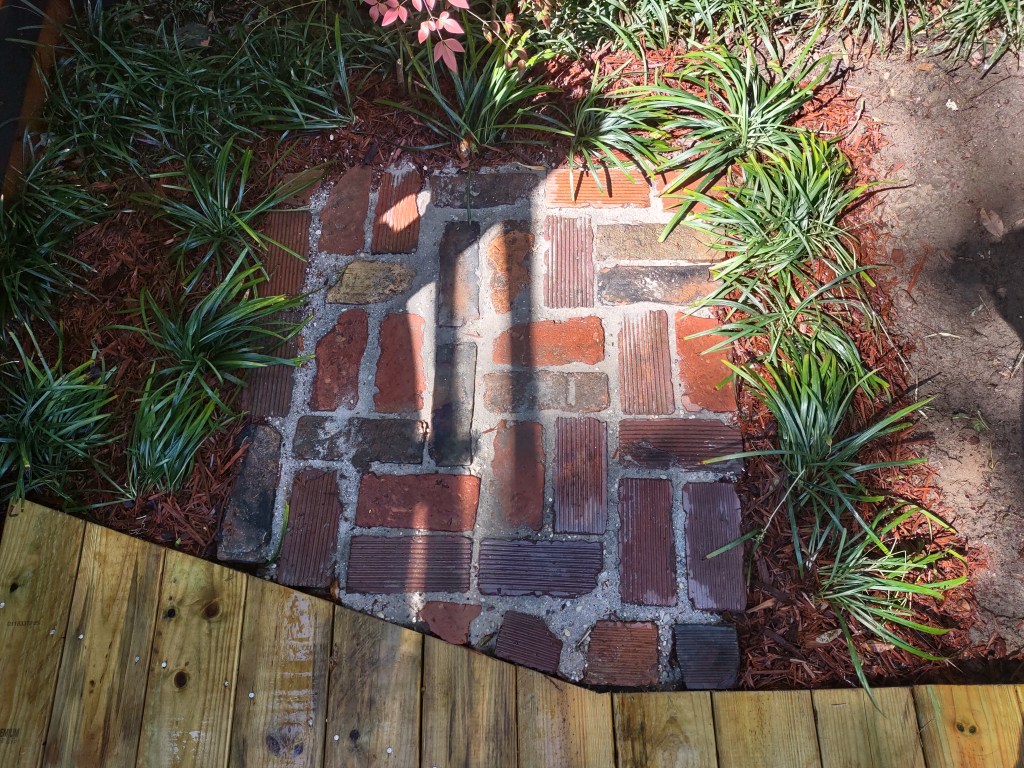
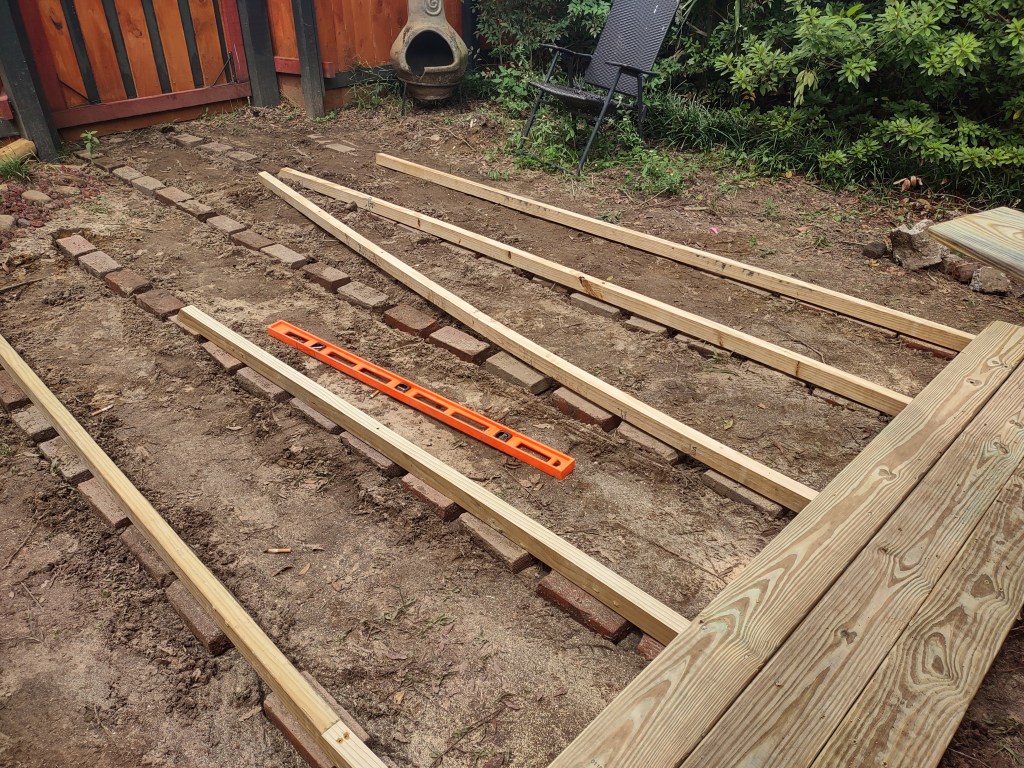
We used leftover materials from previous projects, which kept the costs down. For the deck, we repurposed old bricks, originally used as a pathway that had become buried over time. S dug them out, laid them in rows to create a solid foundation for the wooden joists. While working, it started to rain, turning everything muddy, but he didn’t stop. That’s one of the things I respect most about him—his tenacity. Whether it’s raining or scorching hot, he works tirelessly to get things done.

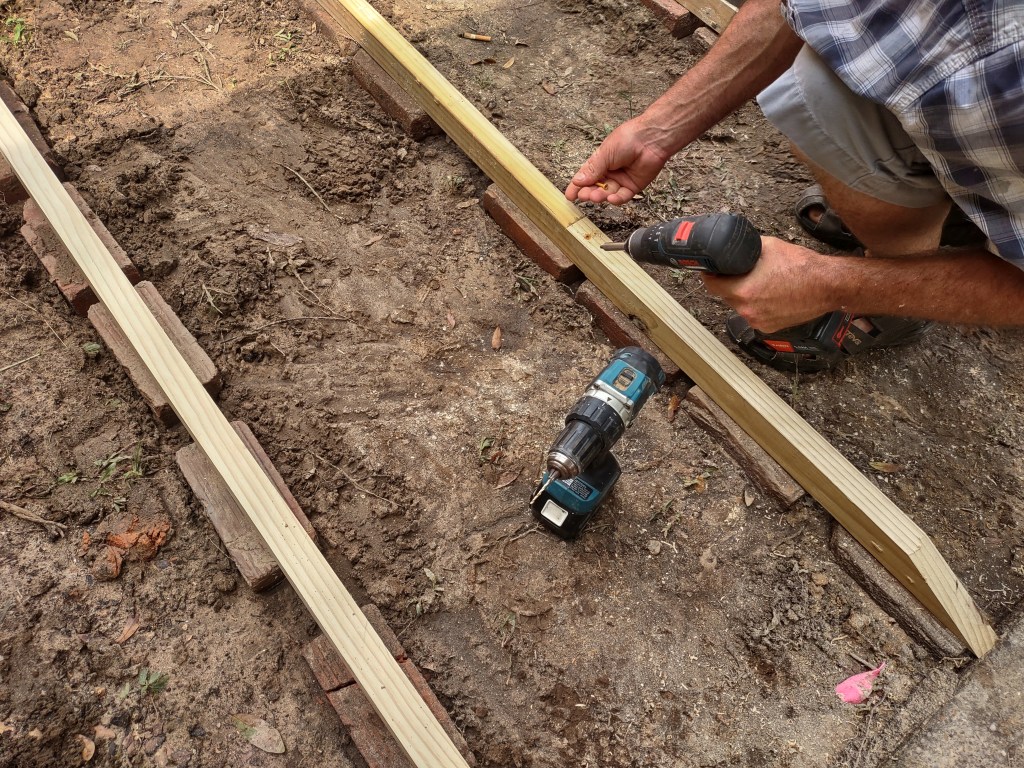
We used a thick wood panel for the joists, which we got at a 70% discount because it was warped. To straighten it, he first hammered wooden wedges on each side of the joist before nailing planks in place.

Also, since we didn’t have enough joists as whole pieces, S joined short ones together. This isn’t ideal as a whole joist would be stronger but S made sure they were secured well.
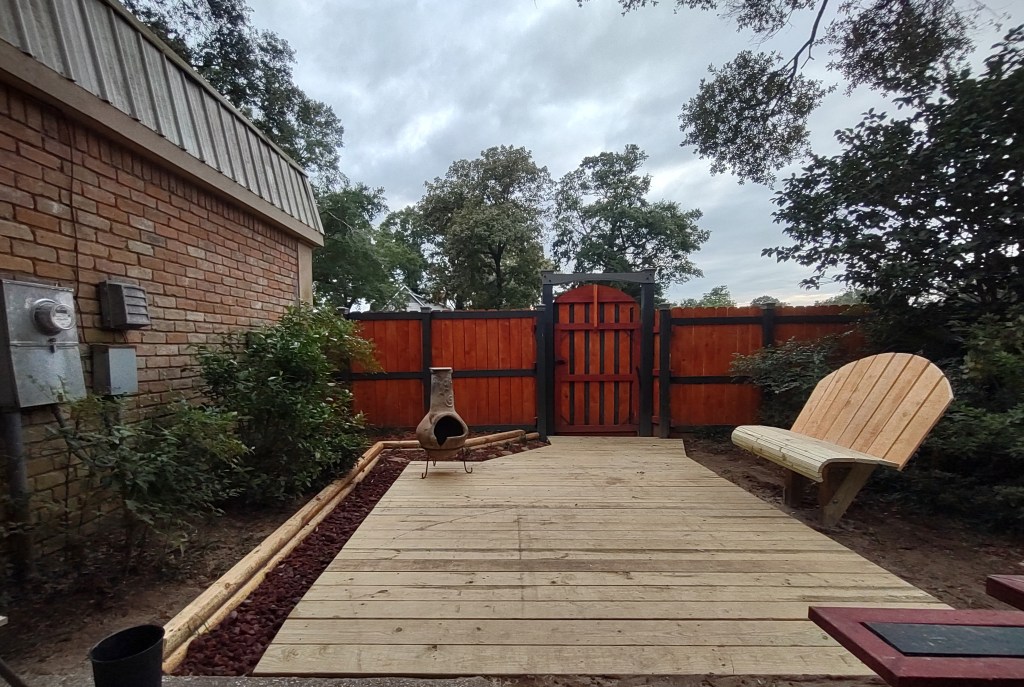
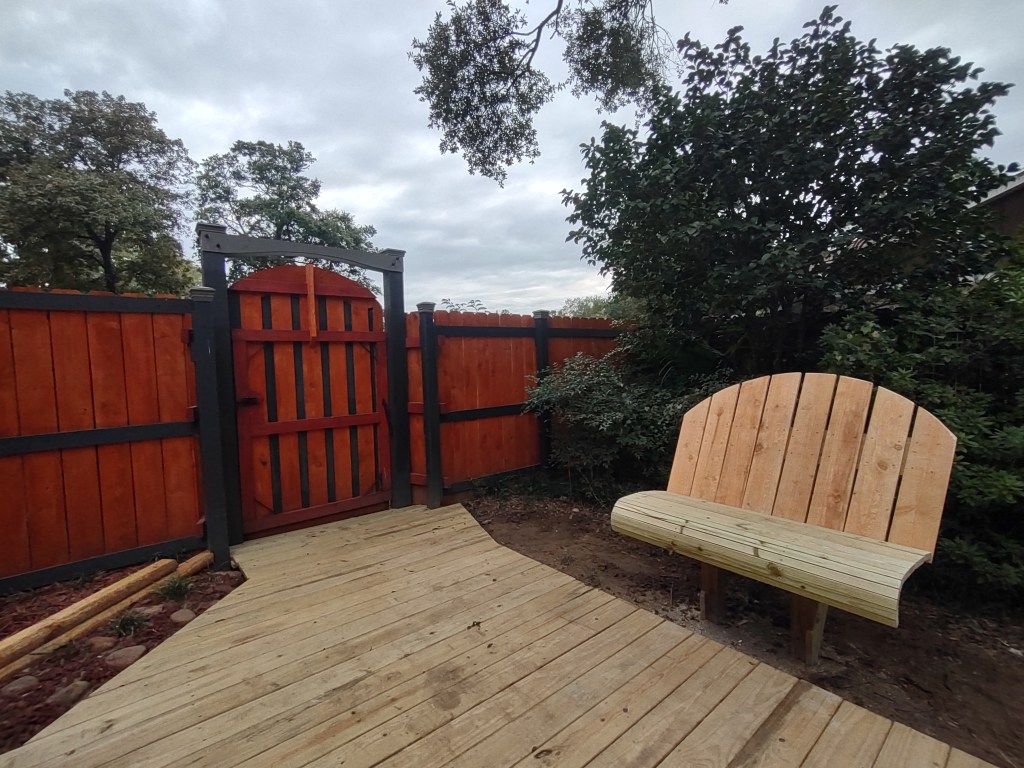
It took him just over two and a half days to finish, including time to buy materials and figure out the details. The deck is small but it’s enough to solve the problem of needing a pathway while leaving room for future expansion. I had really wanted a pathway to address the dirt issue, but I ended up with a deck, far beyond my expectation. So pleased!
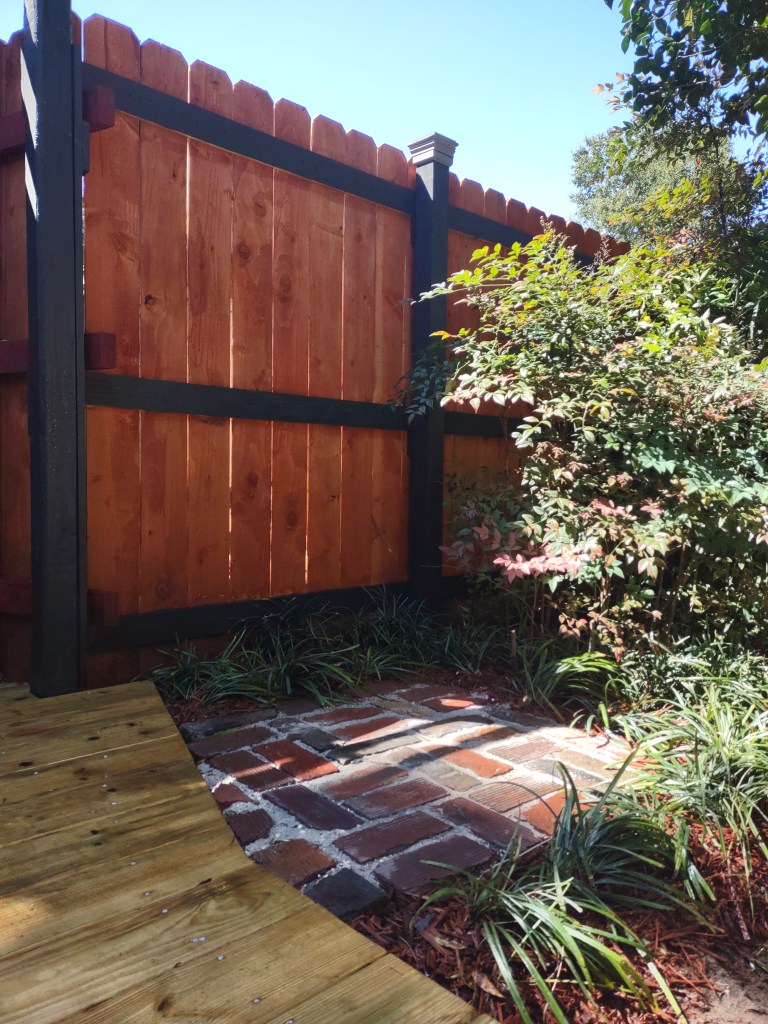
One of my favorite features of the deck is the small slopes he added at the ends. Initially, he used just one plank but the transition was quite abrupt. By adding a second one, the slope becomes more gradual, reducing the risk of trips and falls. Additionally, I love how he shaped the deck that followed the lines of the new flower bed and gate. It looks more integrated with the rest of the yard, rather than just being a plain rectangle or square.

We also decided to designate a spot on one side of the deck for the trash can, keeping it simple with just a foundation. With some extra wood, he built a bench, near the trash can. While it might be not ideal in terms of aesthetics or potential odors, adding a vertical panel in the future will help separate the two areas. Planting a bush or placing a flower planter next to the panel could keep the area looking vibrant and fresh. Personally, I don’t mind the trash can odors because I always try to keep everything, even the trash as clean as possible.
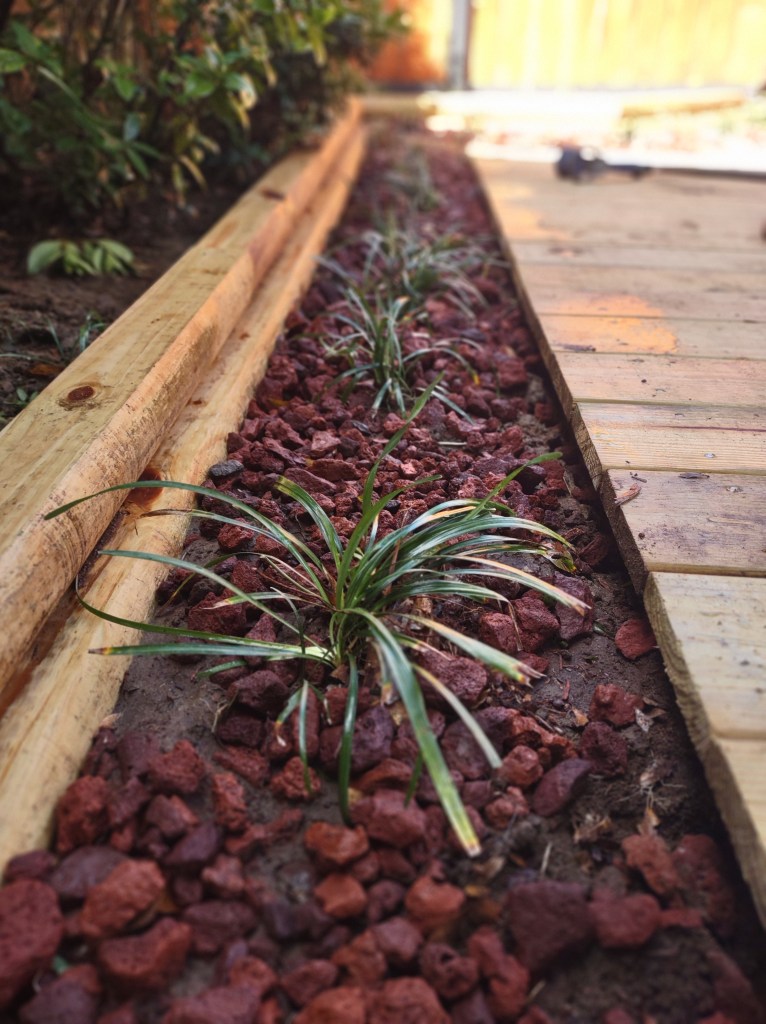
Previously, we built an edge for a flower bed using timbers, but it wasn’t really to plant flowers or trees—just to find a place for some leftover soil. However, we didn’t use much soil since the new bed didn’t need a lot as S didn’t want to affect drainage near the house. While it looks a bit empty now, I’m still happy. I love how contours enhance shapes and structures. Also, with generous mulch and the right plants, I’m sure the bed will look beautiful.
Overall, I think the total cost to fix up this area was around $800. This included leftover and new materials and accessories like timbers, lava rocks, mulch, planks, and more, which feels a bit pricey given the deck’s size. But it would have cost a lot more if we’d hired someone to do it.
You might wonder why we’re still working on the house when we’re about to leave. The truth is, it’s our home, and we’ve put so much effort into it since we moved in. Even though we won’t be here much longer, we still want to finish what we’ve always planned to do.
PS: I”ll update more once the deck and bench are stained and sealed, and the trash can spot is set up.

Update: Our new trash can pad